
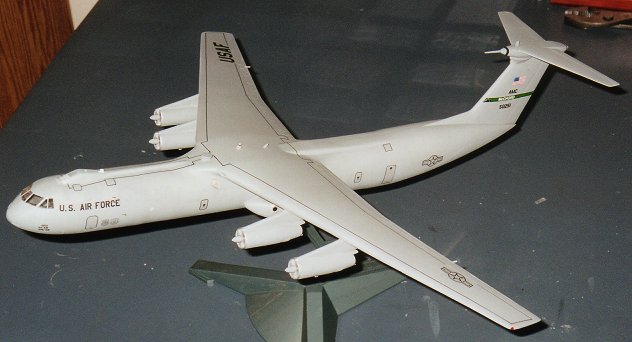
Lockheed C-141B Starlifter
This is the Lockheed C-141B Starlifter. The plane I used to fly. I had a difficult time finding a model of the C-141 at first. They don't make many cargo plane models. They just aren't cool enough for model compaies to be able to make decent money off them. But I had heard that a model existed, so I started looking. I didn't find much at first, but I keep searching. Then I found an old Aurora C-141A model on eBay. For most planes, that wouldn't be much of a problem, but the 'A' and 'B' models are very different. First of all, the whole plane was lengthened. Not by a couple inches but by about 11 feet. The A model looks stubby compared to the B model. There was also a aerial refueling installation added to the B model. I had to make all these changes to the original 1960s Aurora model that I found.
Consruction
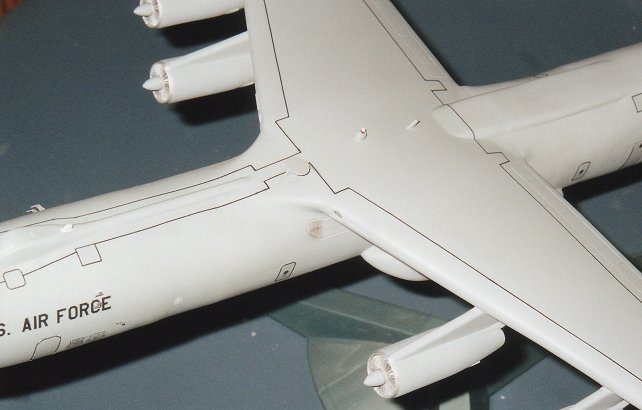
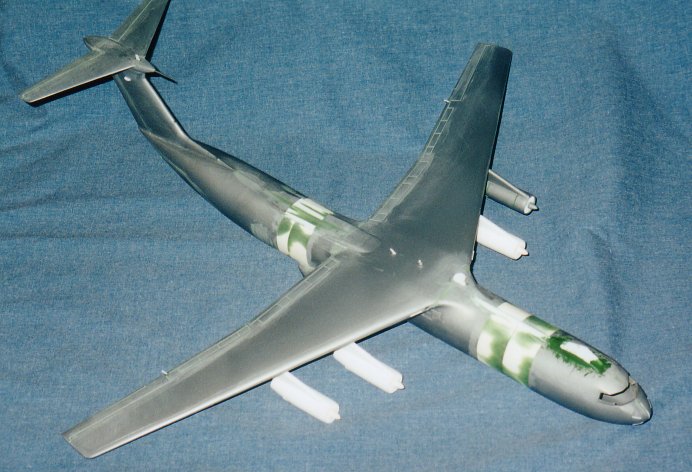
The first thing I had to do was lengthen the model. I had a few pictures of the 'A' model as well as some pictures of the planes while they were in the factory getting stretched. Also, since I had access to the plane I was able to figure out exactly where they lengthened the plane. I used this info to cut the plane about where they made the extensions. You can see in the pictures below that I had to cut around the landing gear pods in the rear cut. I used several passed of a scribing tool to cut around the pods leaving them intact. I had to cut the model there because past that point the bottom of the plane started to curve up.
I then needed to add the length the plane. I did this by making several resin copies of a portion of the fuselage. I glued them all together and then smoothed it out with some putty. (The white stuff in the pictures is resin and the green is the putty.) In the picture of the rear cut, you can see that there was a section on the top of the plane that I had to build. I used styrene strips to build the box up and then I smoothed it out with some putty.
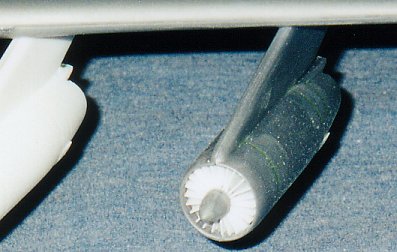
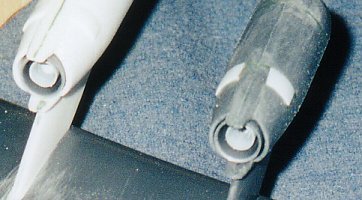
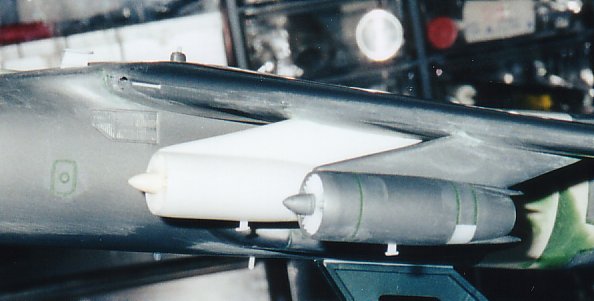
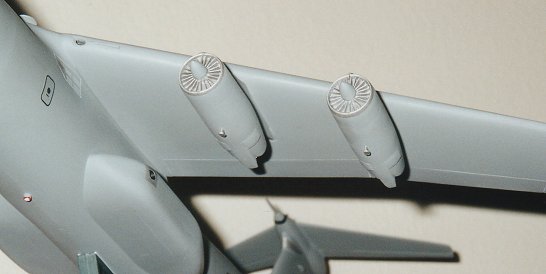
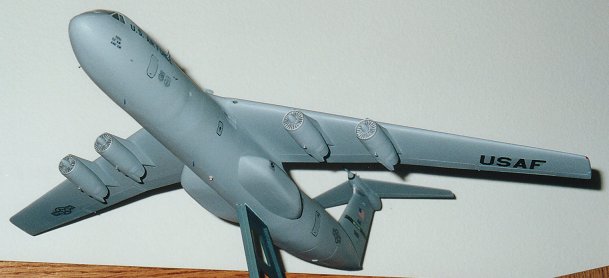
I also had to reworked the engines. They needed an inner burner can in the back piece and a couple oil coolers. The oil coolers are the white things on the gray engine. That was the one I modified and made copies of. I also had to add the stator vanes to the inlet. I glued sixteen strips of styrene to the piece that came with the model and I made 3 copies of that piece. The white engines in the pictures below are the resin copies.
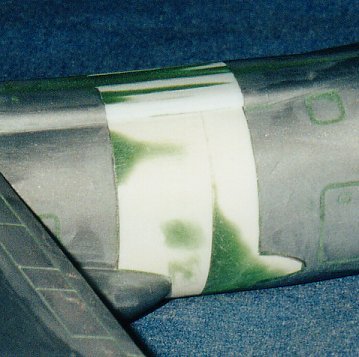
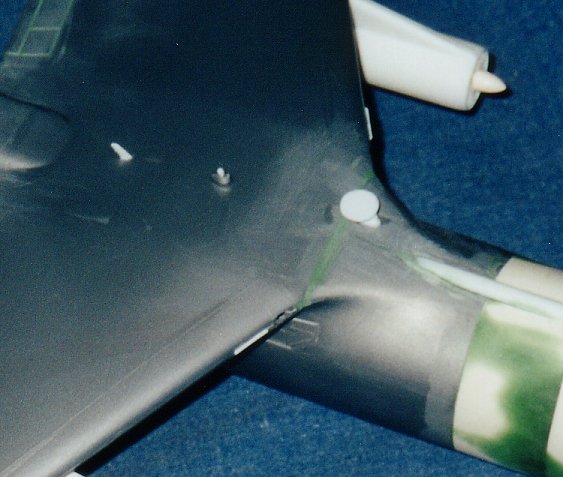
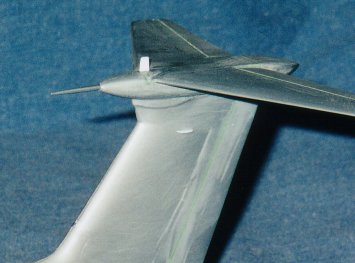
Then next step was to add the refueling pod to the area just above the cockpit. First, I used a half styrene rod that was 5/32 inch in diameter to make the pipe leading to the wing root area. Then I used pieces of sheet styrene to build a rough approximation of the pod. I filled it with resin to add some support and then I sanded and shaped it to make it look right. All the green putty in the pictures below are just before I sanded it to the right shape.
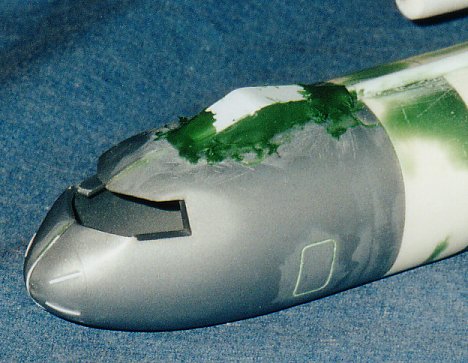
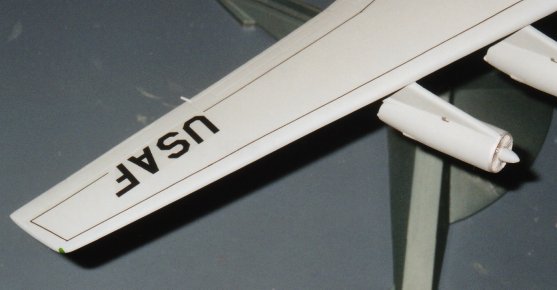
That covers the major work I did on it. I also had to fill in all the detail lines and re-scribe them because they were so thick. Plus, the general lack of details required me to add several probes, antennas, holes, and pipes to the outside. This is the complete list of things I had to add: AOA vanes, rain removal outlets, radome ribbing, pitot-static probes, total temp probes, 2 antennas on the bottom, 3 antennas on the top, 2 localizer antennas on the tail, a UHF antenna on the top of the tail, strobe lights on the top and bottom, ram air inlets in the wing roots, strips on the wing roots (they have to do with stall characteristics), EPR probes on the engine pylons, fuel jettison masts on the wings, drain ports on the bottom of the engines, a SATCOM antenna (the circle on the top), APU exhaust, and the ramp door bumper (the lump on the bottom in the back.)
That about covers the construction. I could have done better with the refuling pod, and some day I may go back and re do it. There are also visible seams and the like, but from a normal viewing distance, it looks good.
Painting and Decals
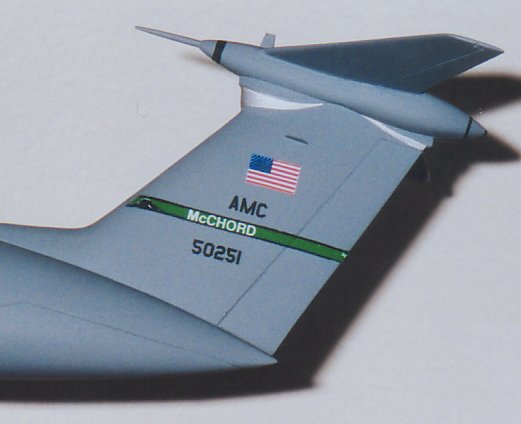
Then I had to paint it. It was a simple Dark Ghost Gray paint scheme. There was silver areas to add around the horizontal tail, the front of the engines, the APU exhaust, the primary heat exchanger exhausts, the door on the refueling pod, and the ribbing on the radome. I painted the inside of the exhaust areas black and the rings on the horizontal tail. The red and green lights on the wing tips and the red and white strobe lights on the to and bottom are also painted.
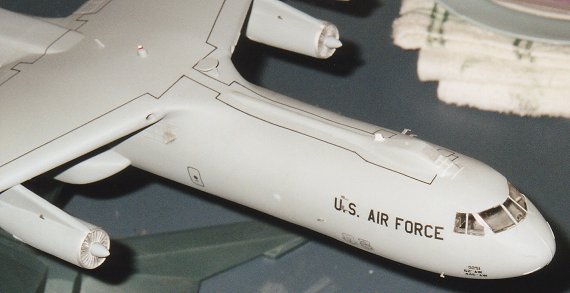
And here is where the challenge began. I had to make my own decals. The decals that came with the model were for the 1960s paint scheme, and they weren't going to work at all. So I got out my pictures and proceeded to make the decals. I found a font on the web to make the lettering, and found some graphic of the flag to use. I had a friend in the maintenance squadron get me some copies of the green tail flashes to use. I actually scanned them and made decals out of the stickers that he got, but the stickers really helped. (Thanks Tony!) I made the rest from scratch. I put on a gloss coat and went to town. After I got all the decals on, I added a few of the details that I mentioned earlier and put on a flat coat and called it done!
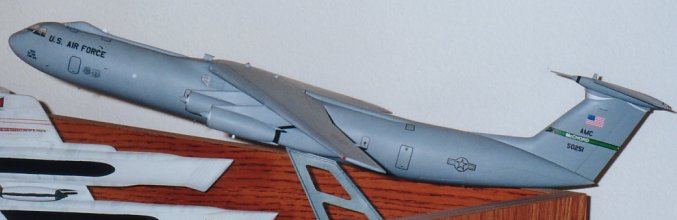
The stand is the one that came with the kit. I didn't want to put to much work in to that, and I actually still need to paint it black. I'm so lazy. It's no big deal, and I'll do that later. Maybe. It was fun to make and it looks good on top of my computer desk.