
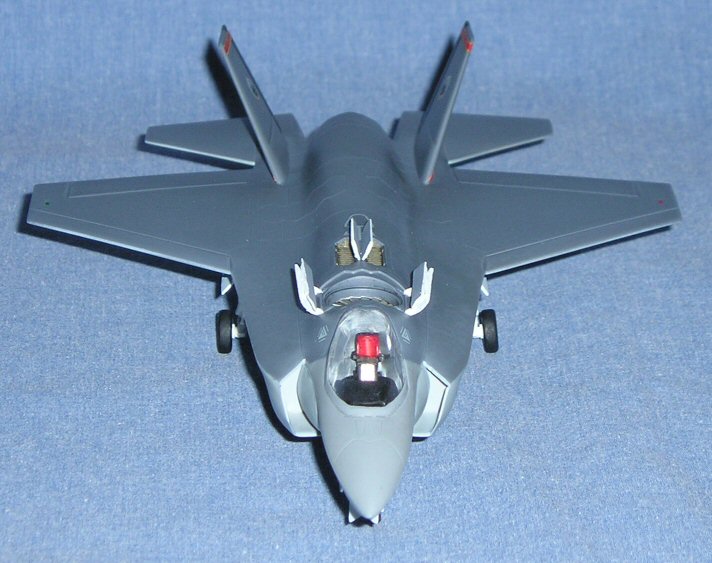
X-35B JSF
This is the Lockheed Martin X-35B JSF that won the JSF competition a few years ago. The JSF program was trying to develop a plane that could be a replacement for the F-16, A-10, F/A-18A, B, C, D and A/V-8B. Also, the UK was looking to replace a few of their planes as well. They were going to accomplish this by creating 3 variants: a conventional takeoff and landing version, short takeoff and vertical landing version, and a carrier version. The 3 versions would have at least 80% common components in each to reduce development, manufactufing costs, and operating costs.
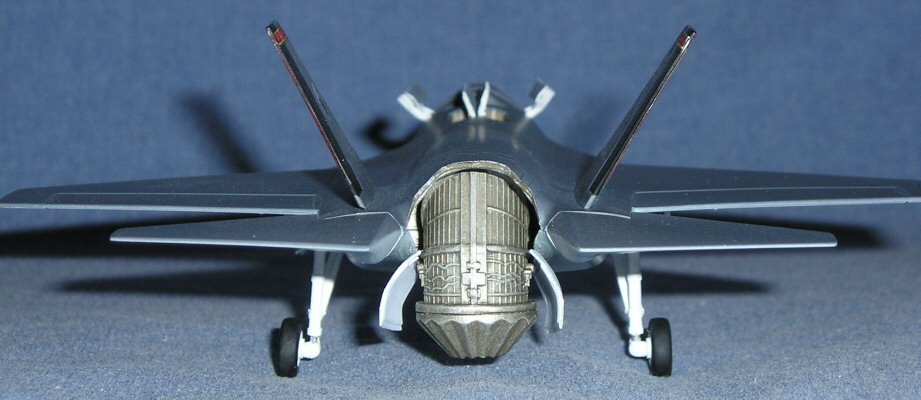
The real highlight of this plane is the B model, with it's STOVL (Short TakeOff and Vertical Landing) variant. The team designed an engine that would engage a special Lift Fan in the front half of the plane and redirect the main engine exhaust downward to produce the lift required. The Lift Fan has all sorts of benifits, and clearly outperformed the X-32's directed thrust method.
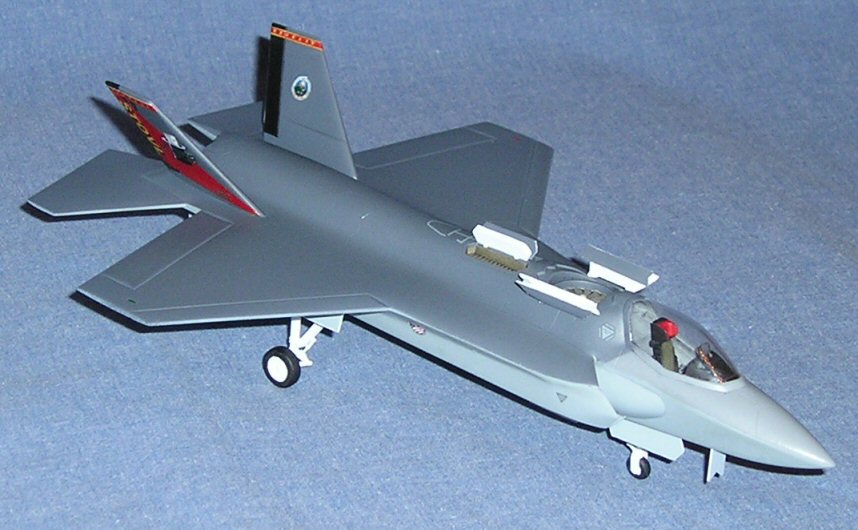
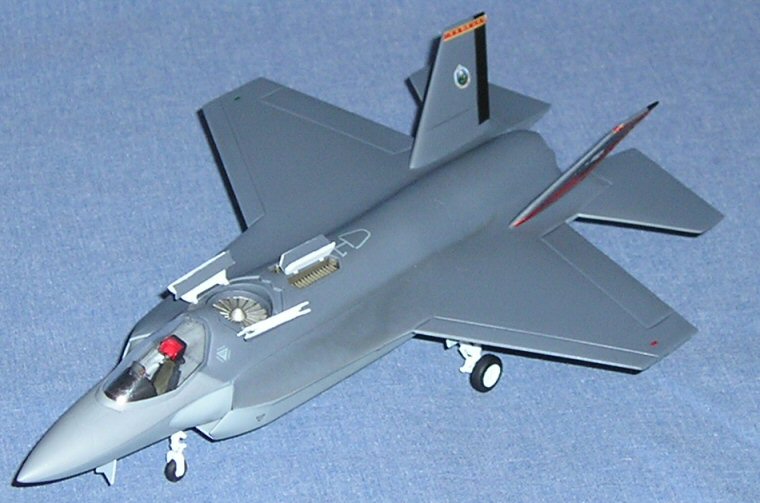
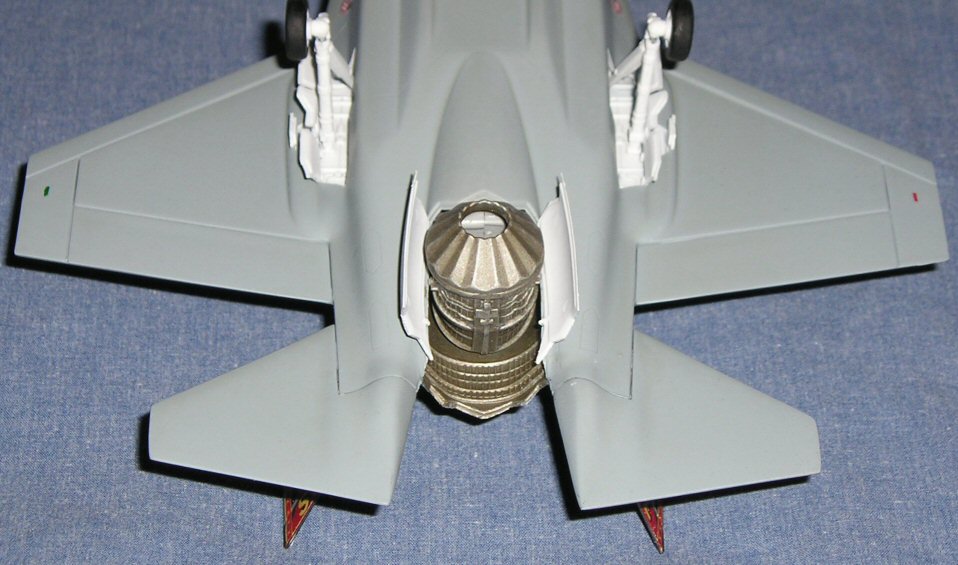
This model is an Italeri model, and has several inaccuracies. The canopy should be a two peice canopy, the ducts behind the fan should open toward the center, the gear doors and lower Lift Fan doors are wrong, and the decals are way off. They have it in some dark ghost gray paint scheme with minimal decals. Totally wrong. All the planes sport a paint scheme similar to the F-16, and the tails have some decent artwork on them.
Also, there are some missing vents, holes, and other minor annoyances. Considering that this plane will be chalked up as one of the 'cool' planes in the future, it surprising that they got it so wrong. I was really shocked to see the decals so wrong. There were plenty of pictures on the net and I'm sure that Italeri worked with Lockheed Marting to get info on the model. Even the simpler B variant decals would have been a huge improvement.
Painting and Decals
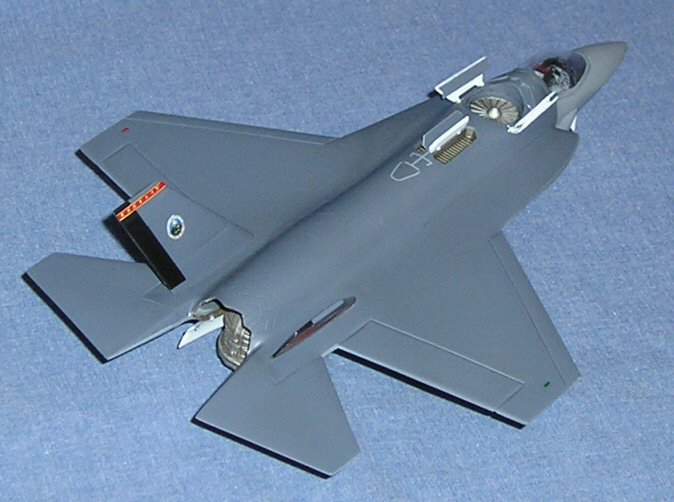
Anyway, building it was pretty straight forward. I didn't change anything except how the rear duct doors open. I just glued them to the other sides of the duct and called it good. Painting it was pretty simple too, but I had to use several online references to get it right. The colors are the same as an F-16's main scheme, and the rudders are black. The hard part was the decals.

Since the decals were so horrible wrong, I used some extra F-16 decals for a couple markings and made the rest. I spent a couple nights looking at pictures I found online of the tails and painstakingly make the tail decals. They turned out about 90% accurate, since I didn't have a font that matched the font they used on the "X-35B" and the number below it. I looked online, but nothing really matched. I just used the best I could, and it looks pretty good from a casual look. I also made the little badge in the middle striaght from a picture that I had to rotate and skew back into a circle. That turned out really well.
The bigest problem with my decals is that I don't have an ALPS printer. Because of that I have to print on either clear or white decals film. If I print it on clear film it doesn't show up that well, and if I print it on white I have to trim the decals right to the printing. (I don't want a white border showing.) Since inkjet ink is water based, trimming the decals to the edge of the printing causes the edges to get blurry. I came up with a solution to print a decal outline on white decal film and not spray the fixing coat on it. I used a very sharp hobby knife to score the decal on the outline so that when I transfered it to the tail I would have the exact shape of the color that I need.

The side, showing my cool decal
It worked great for a first try. I only had a couple spots where the color and white didn't show up, and the decal look great on the whole. Considering what I had to work with, I'd say that I managed to get a very good result. It took a lot of work, but it's always nice to have something like this turn out well.
New Technique
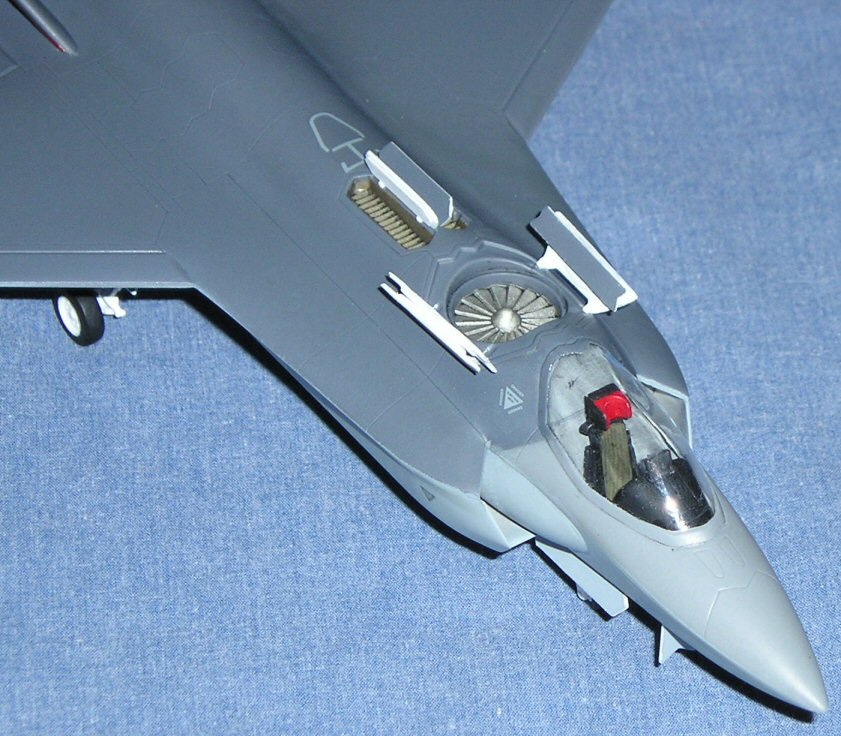
I used a new weathering techinque on the engine. After painting it a base coat of jet exhaust, I dry-brushed some steel on it it. After letting the engine sit while I did other work, I made a little mistake. I didn't put a clear coat over the engine before I brushed a dark wash over it. That would have been fine if the wash was a water based one, but it wasn't. Oops.
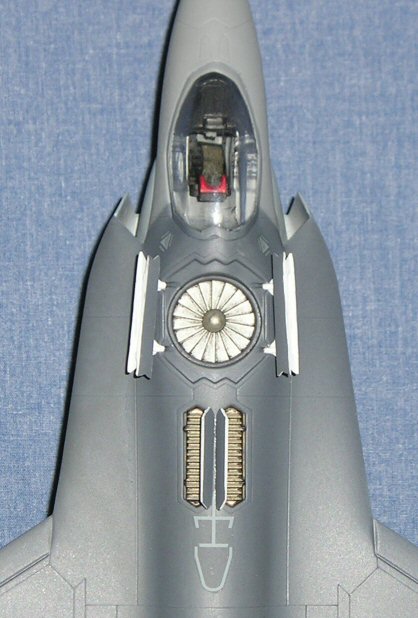
I saw the paint start to wrinkle, and I thought I'd have to start over. No big deal, since it's a small part. Fortunately the wrinkling went away and the engine looks geat. I also applied the dark wash over the Lift Fan and the ducts behind it, but I had already put the gloss coat on, so I didn't have anything to worry about. The wash looks good, so I think I'll experiment a little more with it in the future.
Considering that I took forever to finish this model, I think it turned out great. The decals were a success, and the dark wash turned out well on my small test. It's a small plane, but it looks good next to the other stealth planes on the shelf. I'll be sure to build an F-35 when it finally comes out so I can show the differences in the prototype and production models.