
Changing Colors
Ok, here we go, changing colors. This is a little trickier than changing the colors in Homeworld, but it works well enough for our purposes. And I figured out how to do it in both Paint Shop Pro and Photoshop. I prefer Paint Shop Pro, mostly due to the money issue, and it does all the stuff I need it to do. But you can use whatever you want. First I'll explain colors and badges in Photoshop, since that seems to be more popular. If you want, you can skip this and go to the Pain Shop Pro page. Or read both and see which one you like more.
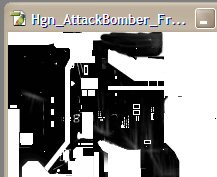 Ok, open up the .dds texture you want to edit in Photoshop. Open both files for the texture, the one ending in [1] and the other in [2]. The [1] file will have the main texture, and the [2] will have the stripe info in it that we need. Say no when it asks about MIP levels. We don't need them. Start with the [1] file and switch to the Alpha channel in the channel view. You'll have a black and white image showing some of the texture. Now, click on the Magic Wand Tool and select a white area. Go to the Select menu and then Similar, and all the white areas will be selected. We want the black, not the white, so go to the Select menu again and pick Inverse. Now, copy this, Ctrl-C or in the Edit menu.
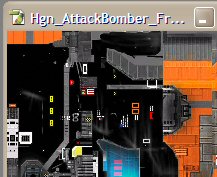 Go back to RGB in the channel view and then switch to Layer view. Paste what we copied, either Ctrl-V or in the Edit menu, and you'll have a new layer with the black from the alpha view. Now, it's decision time. Set the foreground and background color to the colors you want to use for the team and stripe colors. You can go to the Swatches and make new swatches if you want to save your colors for later use. Now, go to the Edit menu and then Fill. The pop up window will ask you what color you want to fill with. Just select either the foreground or background color and make sure to check 'Preserve Transparency,' and *POOF* you'll have color. But it's not done yet. On the Layer panel, set the layer type to Overlay in the little pull-down. There you go, team color!
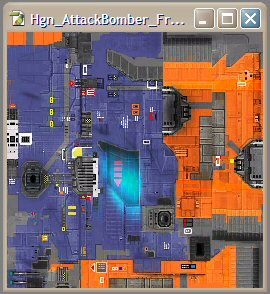
Team colors!
Now, the steps for getting the stripe are just about the same, but we need to pick the Alpha channel from the file that ends in [2]. Do all the same stuff, but there's a catch. When you paste in the new layer, you might not have the stripes in the right spot. Just pick the Move Tool and move the stripe layer until it lines up correctly. Then do the rest of the steps and you'll have a strips. Pretty simple, huh? Now, just save the file as a .bmp and you'll have your colors. Do this for all the textures and you'll be set.
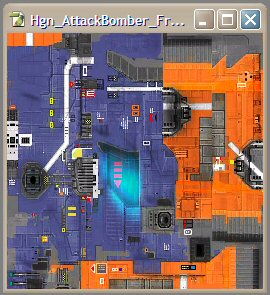
There, all done
One little note here. Sometimes you may have a texture that doesn't have team or stripe colors. These textures will have names that end in [3] or something like that. They are usually the engines and associated parts. Also, if you open an alpha channel and get all white, that means there is either no team or stripe color. If it's all black then that means the whole image needs either the team color (or stripe, but I've never seen it). If you don't get it, you'll figure it out when you open the model in Metasequoia and see that the colors don't seem right.
Adding Badges
Ok, badges. This is a little simpler. Open up the badge.bmp for the model you are working on. Check the image size. If it's 32x32, resize it to 64x64 using the 'Image Size...' item in the Image menu. Now, open up the badge you want to use in the badges directory. You can only use the .tga files, so if you wanted to use another one, sorry. Now, go to the Select menu and pick 'Load Selection...' A popup will appear, but just click 'OK' since there is only one alpha selection to load from. Copy the selection that shows up in the .tga file and then paste it in to the badge.bmp file. A nice little emblem should appear with the nice fading effect on the edges. Pretty cool. Save the badge.bmp and you'll be set. You can change the layer type to Hard Light for the badge layer in the .bmp if you like. It will help make the larger badges with more texture look better. And don't worry about that resize thing we did. The texture mapping in the 3D model won't care about the size of the file. It just maps to relative position, not absolute, so we'll be just fine.
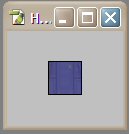
The blank badge
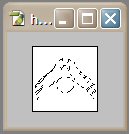
The alpha selection
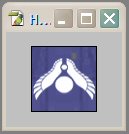
Resized and 'Badged'
Ok, you can do one of two things here. Skip to the Metasequoia section, or read how to do all this in Pain Shop Pro, the choice is yours.