
Changing Colors in Paint Shop Pro
This section is for those users of Paint Shop Pro. It's possible to do all the same stuff in PSP as it is in Photoshop, but you have to do it differently. And the results almost exactly the same, so it's all good. Ok, let's get to work here.
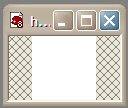
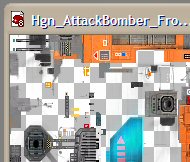 Ok, just like in Photoshop, open up the .dds texture you want to edit. Open both texture files, the one ending in [1] and the other in [2]. The [1] file will have the main texture, and the [2] will have the stripe info in it that we need. Say no when it asks about MIP levels. We don't need them. Starting with the [1] file, make a new layer and move it to the bottom. Set that to the active layer and pick the 'Flood Fill Tool.' Pick the team color you want and fill in your new layer. You'll see the transparent areas have color to them now. But there's a problem; the textures don't show up really well in the new color areas. That won't look very cool on the model, so we'll fix that here.
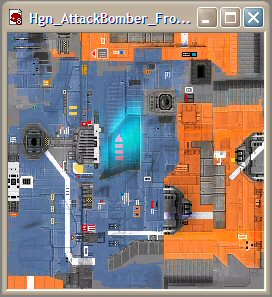
Color! Well, kind of...
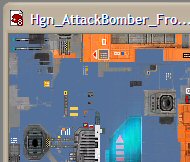
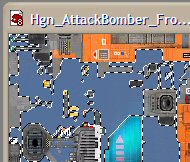 Now, set the top layer as the active layer and then select the 'Magic Wand.' (I love that name.) Set the Match mode to 'Opacity' and the Tolerance to about 50 or so. Now, click where the new color is showing through. You will probably be missing some of the blue, so hold shift down and click on an area that you are missing. Do this until you get all the team color that is showing through. Make sure you get any 'holes' or small areas as well. If you find that you aren't getting enough of the transparent areas, increase the Tolerance. If you get too much, lower it. This is a little hit and miss until you find a good value, so experiment a bit. Once you get all the areas, go the Layers menu and pick 'Merge' > 'Merge All (Flatten).' Then press 'Ctrl-C' or select Copy in the Edit menu.
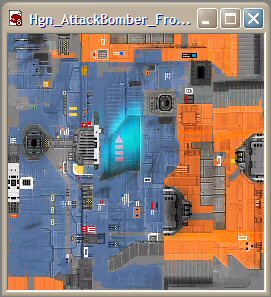
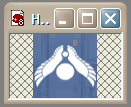
Now, open the .bmp of the file that we are working on and then press 'Ctrl-L' or 'Paste As New Layer' in the Edit > Paste menu. Pick the Move Tool and move the new layer so it's in the right spot. You may have to zoom in to line it up right. (I have to.) Then go to the Layers menu and pick 'Properties...' Change the Blend mode to 'Overlay' and you'll have some nice looking team colors. Don't close this file yet.
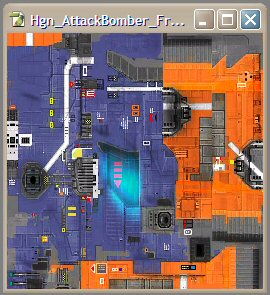
Team Colors!
The steps for getting the stripe are just about the same, but we use the file that ends in [2] to get the stripe. Do all the same stuff, but paste it into the .bmp that we already have open. That's the one that we are using for our texture anyway. And again, when you paste in the new layer, you might not have the stripes in the right spot. Once you change the layer blend mode to Overlay, you should have both team color and stripes in your texture. When you save it, you may want to pick another name if you intend to make different colored models. You'll need the unedited .bmp to do this each time. And when you save, the program tells you that it has to merge all the layers, just click 'Yes' and you'll be good to go.
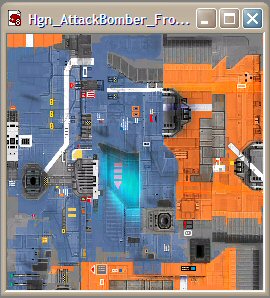
Team colors and stripes
Again, one little note here. Sometimes you may have a texture that doesn't have team or stripe colors. These textures will have names that end in [3] or something like that. They are usually the engines and associated parts. When you open them, there won't be any transparent areas. Also, if you open a [1] file and it's all transparent, then it's all team color. You can just go to the .bmp, and a new layer, fill it with the team color and change the blend mode to Overlay. It will work just the same.
So, here's a side by side comparison of Photoshop and Paint Shop Pro. I'm pretty sure I set the color to the same when I did this, but I could be mistaken. I can't check since my Photoshop trial expired after I wrote this tutorial. Oh well, as you can see the results are pretty darn close. If the colors were the same, I think you'd have a hard time telling the two apart.
Photoshop
Paint Shop Pro
Badges in Paint Shop Pro
Ok, badges. This is a little simpler. Open up the badge.bmp for the model you are working on. Check the image size. If it's 32x32, resize it to 64x64 using the 'Resize..' item in the Image menu. Make sure you use 'Pixel Resize' in the 'Resample Using' option. If you don't, your badge.bmp will look blurry because PSP tries to 'smooth out' the jagged lines. Now, open up the badge you want to use in the badges directory. You can only use the .tga files, so if you wanted to use another one, sorry. Go back to the badge.bmp and make a new layer and fill it in with white. Now, go to the Layer menu and pick 'Load / Save Mask...' and then 'Load Mask From Alpha Channel.' A popup will appear, and since there is only one alpha channel in the two files we have open, just click 'Load.' A nice little emblem should appear with the nice fading effect on the edges. Pretty cool. Save the badge.bmp and you'll be set. Don't worry about that resize thing we did. The texture mapping in the 3D model won't care about the size of the file. It just maps to relative position, not absolute, so we'll be just fine.
The blank badge
The .tga file
Resized and 'Badged'
So, as you can see, we can do everything in Paint Shop Pro that we could have done it Photoshop. Who says we need to spend several hundred dollars on image editing software? So, next is Metasequoia.